This is part 3 in a multi-part series on iOS unit testing and integration testing. In the last post, we discussed setting up SVProgressHUD.
Magical Record
Magical Record is an excellent library that compliments the Core Data framework. I’m going to assume some knowledge of Core Data here. If you need a reference, the Core Data book by Marcus Zarra is excellent, and just hit its 2nd edition. We are going to build out a very simple data model, with just one entity. This will allow us to set up the core data stack and verify that Magical Record is working.
Let’s get core data set up:
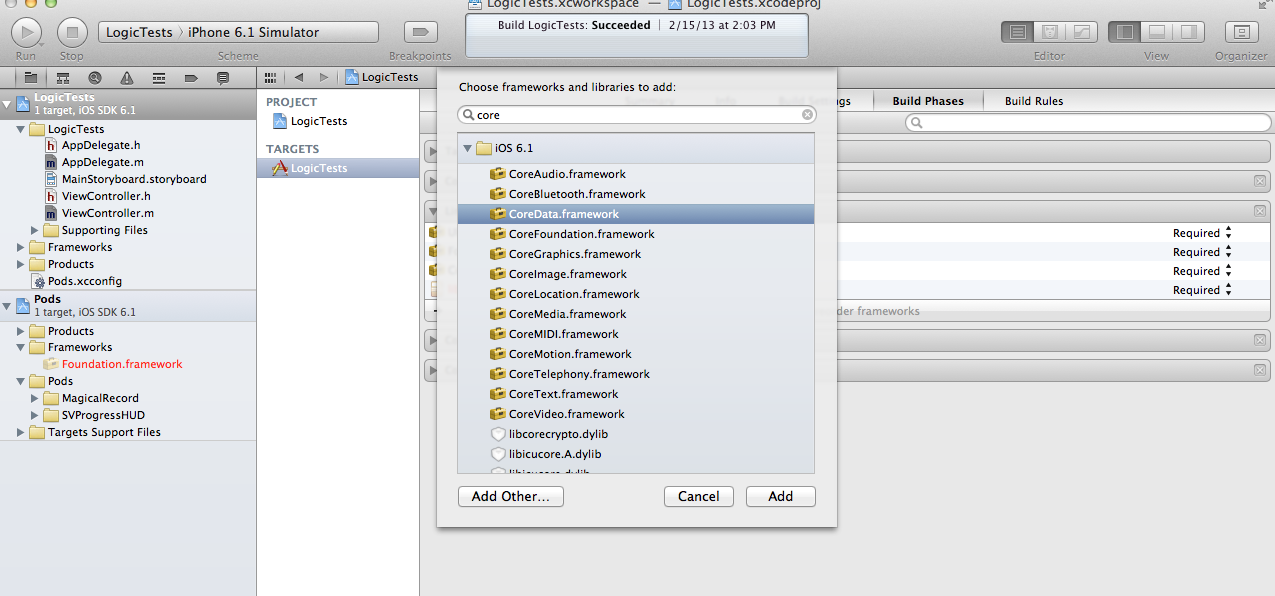
Add the Core Data framework in the Link Binary with Libraries step
- Click the project node in the project navigator sidebar on the left
- Select the app target
- Select the Build Phases tab
- Open the Link Binary with Libraries list
- Click the ‘+’ button
- Search for ‘Core Data’
- Select
CoreData.framework - Click the Add button
Add an import for Core Data to the precompiled header file to make Core Data available for the entire project
- Open the precompiled header file - This file is usually placed in the Supporting Files group, and is named [project-name]-Prefix.pch
- Inside the
#ifdef __OBJC__block, add#import <CoreData/CoreData.h>. This will make core data available throughout the project without having to import the framework everywhere it needs to be used.
Add a data model to your app
- Right click on the group in the project navigator that represents your app. For me, this is LogicTests
- Select New File
- Select Core Data => Data Model
- Select Create
- Your new data model should open in the graphical editor. By default, it will be named Model
Create a Person entity
- On the bottom toolbar, click the Add Entity button
- A new entity will be created and the name will be editable immediately in the left sidebar. Type Person and hit Return
- We now have a new entity. We need to create attributes for it.
- Under the Attributes section, click the ‘+’ symbol. Name the new
attribute
firstNameand make it aStringtype - Repeat this process, and create a
lastNameproperty, also of typeString - When you finish, your entity should look like this:
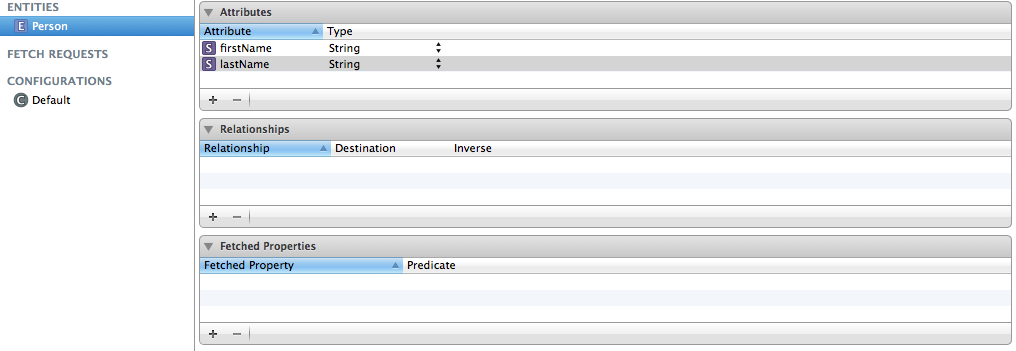
Person Entity
Create an NSManagedObject subclass 1
- With your newly created Person entity selected, go to the menu bar, and select Editor => Create NSManagedObject Subclass
- Leave everything as-is, and click Create
- You should now have a
Person.handPerson.mfile in your project navigator. Inspecting these files will just show some standard property declarations in the header, and@dynamicdeclarations in the implementation. Without diving too deep here, the@dynamicdeclarations simply tell the compiler that the implementation is there forNSManagedObjectsubclasses and prevent compiler warnings. - Let’s take a sanity break here and hit ⌘B to make sure the app builds.
Use Magical Record to set up the Core Data stack
Magical Record is an excellent helper library that makes interacting with Core Data much easier. It adds syntax that allows you to perform common operations in 1 line of code instead of 3 or 4. Let’s add Magical Record into the mix and use it to bootstrap our Core Data stack.
- Add an import to your .pch file so that Magical Record is available project wide. My .pch file now looks like this:
#import <Availability.h>

#define MR_SHORTHAND
#ifdef __OBJC__
  #import <UIKit/UIKit.h>
  #import <Foundation/Foundation.h>
  #import <CoreData/CoreData.h>
	#import "CoreData+MagicalRecord.h"
#endif- The
#definestatement allows you to use Magical Record calls without a prefix. Without this define, you would have to prefix all of your Magical Record calls withMR_ - The
#import "CoreData+MagicalRecord.h"statement adds categories to several Core Data classes, which allow you to use the Magical Record extensions
- In your app delegate, add the following statement to set up the core data stack:
[MagicalRecord setupCoreDataStack]; - Build to make sure everything is wired up correctly and you get no compiler errors.
Ok, now we’re all set up. Next, we need to create the unit test bundle and begin to meet the challenges of creating unit tests against our code.
I’ve put my progress so far up on GitHub for reference. Please feel free to check it out!
Mogenerator. Mogenerator is a much more elegant and destruction-proof way of doing this, but for the sake of brevity, we’ll just use the built-in class generation from the Core Data modeler.
- I always create
NSManagedObjectsubclasses. I prefer to use [return]